Posts

Showing posts from 2020

Let it SNOW- Guest designing at beadesigns.bcn using Peace digistamps

Image
Hello crafty friends, I'm so much excited to share 2 projects with you as a special guest for @Beadesign.bcn . I am so thankful for such an wonderful opportunity...!!! Are you ready for some Christmas fun? Here is the 1st - "Let it SNOW" I used adorable little skier and coloured in with Copics, fussy cut it out and setting aside.. Still at the die cutting machine, I die cut a trimmed white panel using the hillside dies. To the base of the card, I added a stencil feature at the top, using the Mini Cloud stencil and some Blue Breeze ink.. I added embossed die cut SNOW letters, then added this to the card base with foam tape for a slight dimension.. Next, I adhered my image and die cut snowflake ❄️ to the card base and completed the card by adding a sentiment "let it snow" Let's move forward to 2nd Card- Christmas ornament CardOrnaments are a true signature feature of Christmas.  Today we are featuring beautiful ornament stamp set, from Peace Of Night. For this...

Hugs card from Thegraymuse

Image
 Hello, friends. Today I have a floral card to share with u all. so I used another stunning floral stamp set from @thegraymuse "HUGS" stamp set. I used my Copic markers to color the image. I also used a sky blue marker to color the border around the image.  Finally added some pink glitter powder on Hugs sentiment...  #cardoftheday #thegraymuse #thegraymusestamps #floralcards #hugs #cardmakingsuperpower #handmadecards #cardmakingchallenge #flowerlove #pinkflowers

Happy Thanksgiving card using waffle flower crafts

Image
Hello there!  Happy fall Y'all🍂🍁 Today I have a couple of cards to share, I love this fall inspired stamp set from @waffleflowercrafts.  This is a happy Thanksgiving stamp set. It has 5 tiny little leaf images that I used along with some rock n’ roll inking to create a falling leaves background. Fall is my favorite season. I feel like I appreciate the  turning leaves more and more each year, and wish that the colors would last a little bit longer.  I love the beautiful color of maple tree’s leaves.🍁 I share a variety of card ideas featuring the Beautiful Autumn Bundle from @waffleflowercrafts happy thanksgiving stamp set.  I inked up the stamps with waterbrush markers... Then fussy cut them all & They were adhered to a card base with some foam adhesive for dimension.  Die cut Happy Fall sentiment arranged at the centre. Thank u for stopping by... I hope u like this beautiful inspiration...  Click here to grab this autumn stamp set-  https:...

Centre picture window card- Run to school.

Image
Hello friends! I have a fun interactive card to share with you today using a new stamp set from Magengo designs called RUN TO SCHOOL. I am so excited to be a part of guest designer for this month...this set contains adorable critters r running to school and you are definitely going to want to get your hands on it.  I made the best Center Picture Window Cards! I  had so much fun making this style of card and will definitely be making more in the future!  I tried to keep it fairly simple on the front to make a school view on hillside.  When you open the card, a three dimensional scene unfolds with the adorable critters r running to school. Too cute!  Thank you so much for coming by and please follow me on instagram & subscribe to my blog leave a comment below! I hope that you find tons of inspiration along the way! Check out the Magengo designs shop for products by clicking on the link- https://www.etsy.com/listing/854006007/run-to-school-digital-stamp-set-svg...

Ding, Dong, The school bell rings.

Image
Hello Crafty Friends!  I am very excited to be a guest designer for Magengo designs this month. These images are just so cute I had so much fun creating my card. I absolutely love these school critters release.  The card I'm sharing today features Run To School digi stamp set. For the scene I used the Hillside & grass Borders. I die cut one border from Cilantro cardstock and ink blended the edges with Lucky Clover Oxide Ink.  I used the Cloud stencil and ink blended with Salty Ocean Distress Ink. I fussy cut & coloured these images with copic-colouring and assembled the card. I added the sentiment and added highlights with a gelly roll pen. Check out the Magengo designs shop for products by clicking on the link- https://www.etsy.com/listing/854006007/run-to-school-digital-stamp-set-svg?ref=shop_home_feat_2

Guest design - Thinking of you Pretty Poppies & Awesome blossom- Big hugs

Image
Hello! Its Jaya here.  I'm so excited to be the August release " wings & petals " guest designer for varada sharma stamps. such an honor. I have been a fan for a long time and varada is very kind.  Card 1- Today I am sharing card made from stacking dies.  For my cards, I used rectangle dies, but you can do these techniques with different shapes, too. Perfect timing! I just bought a bunch of stacked die sets. Now I know that what I can do with them.  My card features the new stitched rectangle dies to make the card a bit special, I used Red & lime green coloured cardstock. I like paper♥️💚 colour combination. I like this unique design! I added a thinking of u sentiment and sequins.  You can also use circle stacking dies creatively or shape dies. Thank u so much😊 @jennifermcguireink for sharing all these great techniques with us... Key Ingredients for this card: 1. Pretty Poppies digi stamps by Varada 2. Neenah white cardstock 3. Red cardstock 4. Green ca...

Mudra stamps craft challenge #34

Image
Hello, there! I  am here with u today. As  the challenge theme for this month @mudrastamps is think India, I’m going to share how to use die cut layering to create dimensions on your card.  This is  fun Nested Circle Die Technique This fun indian tricolour Circles are gorgeous, but you know me, I like to keep things simple. So I decided to do something colorful, yet easy. All you need to do is cut layering circles in all sizes, in a variety of colors, then mix and match to create fun cards like these… Thank you for your visiting here and I hope u enjoyed my inspiring project😊

Pull tab slider card- on your bike from clearly besotted stamps

Image
Hello friends,  I made this cute interactive card with a sliding tab that animates the card and reveals a message! I have done too many interactive cards before, but I was eager to try out some new ideas, As the sentiment strip is fully extended, the bike "Rides" across the card front...  Step-by-Step Step 1 To prepare the sliding panel, cut  cardstock  to 3.25" x 5".  Die cut  a  pull tab  from cardstock, then fold the piece in half and adhere the open side to the edge of the panel.  Step 2 Cut a  slider slot  in the card front. The slot for the sample is approximately 1/4" wide by 3.75" long. Added a penny to the back of slit with foam dot.  Step 3 Stamp, color, and cut out the  focal image  of the card. Adhere one side of the tab to the back of the image using a  glue dot . Step 4 Align the slider and sentiment panels, and adhere the back of the slider tab to the sentiment panel. Step 5 Add  foam dim...

Cute as a bug

Image
Hey there friends,  Today is the release day at Stampers Delight.  So, let's celebrate with a fun card made with their new release "cute as a bug" digital stamp set. This stamp features a cute bug watering to plants in the sunny morning.  I used this bug digistamps. I coloured this cute images with copics.  Firstly I blended cloud border line on the upper side of the card base with carved pumpkin distressed oxides. So that it looks sunny day... I assembled the card & added some highlights & enamal dots. I stamped couple of clouds from mama elephant stamp set. Then added that shiny sun behind the cloud. I coloured the laws with green copic shades as it looks grassy tips.  Finally added cute as a bug sentiment on the top.  This is so far, my favourite set with June release. Can't wait to make more cards with this adorable bug.  You can grab this digi here: https://www.stampersdelights.com/store/c18/%2AALL_DIGITAL_STAMPS_PRODUCTS%2A.html#/ Thanks ...

Adventure awaits

Image
Hello crafty friends,  I have a card to share that features one of my favourite from new June release- Adventure awaits!!! This camping digital stamp set comes with a propstprops like flashlight, camping lantern, bonfire, magnifier etc.  For this card I wanted to create a lovely camping scene.  To begin, I prepared a piece of 4×6" card base. I used some ink blending technique to make a cloudy night scene. I ink blended the upper area with distressed oxide inks. I uesd an stencil sheet I had made using skyline border dies for colud pattern.  I finished colouring and later on I added splatter of white paint onto the sky. I for cut some grass border lines & adhered the images onto the card base with foam tape. Finally trimmed that sentiment and adhered on the top of the card base.  That's it for today... You can grab this digi here: https://www.stampersdelights.com/store/c18/%2AALL_DIGITAL_STAMPS_PRODUCTS%2A.html#/ Thank u so much for reading this post.  I...

Mft let's stick together

Image
Hello everyone.. I have a cute project to share with you today featuring the adorable Let’s Stick Together stamp set from @mftstamps... I started by die-cutting trio of hearts out of white card stock. Next, I stamped all the adorable cacti and colored them. I stamped the sentiment  using black ink, and added this  between two hearts and all the images on it, using foam tape. I hope u liked it... #mftstamps #sizzixdies #cardoftheday #cardmakingsuperpower

To my stud puffins

Image
Hello crafties,  It's time to kick off may with a new challenge... This is the Valentine’s release from #LawnFawn and I just had to use that adorable Stud Puffin set..More dies less stamping..Vellum clouds ☁️ can't b visible due to bright background on the upper side of card panel☹️. I m heading over to #lawnfawnaticschallenge #challenge76 Anything but a card... For this love themed card, I used the Stud Puffin stamp set. For background I used pattern paper cardstock from Papericious. I used the Simple Wavy Borders for the ocean and Simple Hillside Borders dies.  I stamped the images and colored them with Copic Markers. I die cut or fussy cut the images and assembled the card. I stamped the sentiment and added some highlights. Then added some cute sea critters. I hope u all like it... Thanks for visiting my blog.  Happy crafting.  Hugs  ♥️Jaya♥️ For more inspiration plz visit my insta feed... https://www.instagram.com/p/B_5M1LJp10o/?igshid=1ak...

Unicorn & rainbows

Image
Hi everybody!  Hope your weekend is going great. I have a super fun and happy card to share today; made with the  adorable Unicorns and Rainbows stamp set ! Unicorns and Rainbows are everywhere – they are trending and so hot right now. Who doesn’t love a unicorn?  I colored up the cute  unicorns  and then die cut pretty,  puffy clouds  and a  colorful rainbow . What a scene! I used my copics to match my cardstock and had loads of fun coloring rainbow unicorn hair!  I stamped the two unicorn images with  Intense Black Ink  and die cut them out with the matching dies. The Clouds dies cut like a dream. I cut two pieces and layered the top one with foam tape. It’s hard to photograph, but the unicorn wings, the star, and the horns were all coated with a layer glitter  for a touch of shimmer. The unicorns, rainbow and clouds are mounted onto the card with foam squares. I hope u enjoyed this inspiring card... ...

Mermaid underwater scene

Image
Hello friends, I m back with my another set of may release stamps featuring mermaid Kawaii digistamps called let's make a splash! SD mermay for u make a splash with this cute set of mermaids with a couple of sentiment & ocean critters. You can have a fun under the sea. I first started with making background. I used Tim holtz distressed oxide inks. Then stenciled some seaweeds on both sides. I used couple of stencils to make a complete underwater scene. I want to create waterbubble effect with bubble stencils. Continue blending with seaweeds stencils at the base of card panel.. finally I Stamped few fishes to swim around these cute mermaids. Added more sealife with this cute shells & crab in the sea. Then trimmed sentiment & adhere on the panel with foam tape. Finally it's done! You can grab this digi here: https://www.stampersdelights.com/store/c18/%2AALL_DIGITAL_STAMPS_PRODUCTS%2A.html#/ https://www.stampersdelights.com/store/c67/May_2020....

Mermaid shaker card

Image
Hi all! I'm so excited today to share my shaker card for Stampers Delight May  New Release!  I play with the newest stamp set from SD called   Mermazing . This set is so cute and gorgeous, I LOVE it!! So I made an sea underwater scene and love how it turn out :) I wanted to create a shaker card & just fill the frame with mermaids & their swimming companions... I had a fun with choosing hairs & tail combos for mermaids. I added a layer of glitter on her tail & it looks fabulous. Just love how bright & fun all these colours are! Before adding the acetate I placed my card panel on top of my card base and only glued the inner panel that way it is lined up nicely. I then arranged some of my images. Now I was ready to create the shaker component. I used various star shaped sequins to match my color scheme. I adhered acetate and foam tape onto the frame and placed it onto my card base. The sentiment is then trimmed & adhere to the car...

Aaa birthday Challenge-dots/strips

Image
Hi! Today I am sharing several techniques and tips for using sentiment strips.  I like adding sentiment strips to my cards because they can easily be added anywhere… and you can make te them too. I then cut lots of strips  from scrap pieces of colorful cardstock. On them I stamped sentiments from Altenew layered cupcake stamp set. This design is a great one for using sentiments from many different sets together. You can make it for any occasion… and use up colorful scraps! Hope u liked it... Till then Happy crafting ..

Swing Card

Image
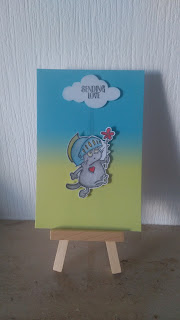
Hello friends,  Today I have a fun and EASY Peasy interactive cards to share with you inspired by the images from the scrapberry's stamp set.  This card was made using some principles, the stamped images swing on the card.  To begin I stamped out the images using blackout ink onto beautifully blended cardstock and then colored them in using waterbrush. I then fussy cut  them out. I added one big cloud to the background using foam tape then stamped out the sending love sentiment from the lawn fawn. Hope you were inspired by my Swinging mice to add a little interaction to your next card by trying out the swing mechanism. For more inspiration plz subscribe my youtube channel... Video will be updated soon Thank you for watching and until next time… Happy Crafting!

Less is more challege- OLC no sentiment

Image
Owl card Hello there friends,  Hope you are all doing ok? I have another card to share made for the  'Less is More'  challenge again. They want us to make a 'One Layer card' and also 'Not use a Sentiment' too. It was hard not use a sentiment on this one... This  cute 🦉 freebie is from Janesdoodles... Simply I coloured this cutie with pencils.. Then fussy cut it out... Then I blended some lime green circle & adhere this adorable owl with foam tape...stamped some heart trio around it.  Hope you enjoy my cute owl ;) Stay safe and stay at home everyone xx

Less is more colour challenge

Image
Do you prefer cupcakes, or a cake on your birthday? celebrate your birthday just the way you want it.  Today’ I’m sharing another card made with the  Altenew Layered Cupcake stamp set . To make this card for your favourite cupcake cutie, I start with a panel of white cardstock. Stamp the different layers of the cupcake – I love how this image has so many layers that make it look so 3D! I start with the 2 step cupcake liner, then stamp the cupcake and then do the 3 step icing.  I used candid apple and Coral Distress Inks for the icing.  for the cupcake, and finally Spun Sugar, Powder Pink and Worn Lipstick ink for the icing. After stamping cupcake, stamp the sentiments, also from the Layered Cupcake stamp set, in archival Black ink above it.  Add a finishing touch using the different sized dots in the stamp set, and stamp them in the same colours you used for your cupcake. So that it looks sprinkle balls on icing...   Then I Stamped shad...

Timeout challenges-Birthday theme + die cutting

Image
First up today is a super fun birthday card with the adorable mama  elephantstamp set! I adore them! I stamped and die cut out images and clouds . I used the Purrfect Birthday stamp set for those add-ons. Then, for the sentiment I used the altenew Happy birthday stamp set. This is a slimeline card - measuring 6" x 3". I love the sizzix Circles die cut and cut that out of a white panel. I blended the back of circles with Distressed oxide.    The top white layer with the circles was mounted to the card using foam tape. Again I spattered some oxide inks. Then I attached the elephants and clouds with foam tape also.  I added a few sparkly purple enamel dots to finish it off. I hope u all like it... This is my 1st slimeline card for challeges.. Happy weekend 🤗